Installing OpenCV 4 on Windows 10
I love working with the OpenCV library, but it can be a royal pain in the butt to get it installed and running on your machine. This is especially true for Microsoft Windows. Despite a Google search turning up plenty of results for articles promising to show you how to do it, they all seem to have issues or be incomplete. This results in a rather frustrating experience when you just want to get things up and running.
The purpose of this tutorial is to walk you through, step-by-step, how to install OpenCV version 4 on your Microsoft Windows 10 system. So, let’s quit talking about it and jump right in!
Video Tutorial
Step 1: Install Visual Studio 2017
Before we get down to business and install the OpenCV library, we first need to satisfy some prerequisites. The first of these is that we have Microsoft Visual Studio 2017 installed on our machine. The community version of Visual Studio can be downloaded for free from Microsoft.
When installing, you need to make sure you select the option to install the Visual C++ build tools.

Continue through the rest of the install process and you should end up with Visual Studio Community Edition 2017 installed on your system.
Step 2: Install CMake
OpenCV uses CMake as its build system, so we’ll need to get that installed before we can move on to building the library. You can download the latest release of CMake from their website.
Step 3: Download OpenCV4 and OpenCV_Contrib4
Now that we’ve satisfied those prerequisites, we can download the source files for both OpenCV and OpenCV_Contrib. To do this, go to the respective Github pages and choose to download them as a ZIP archive.
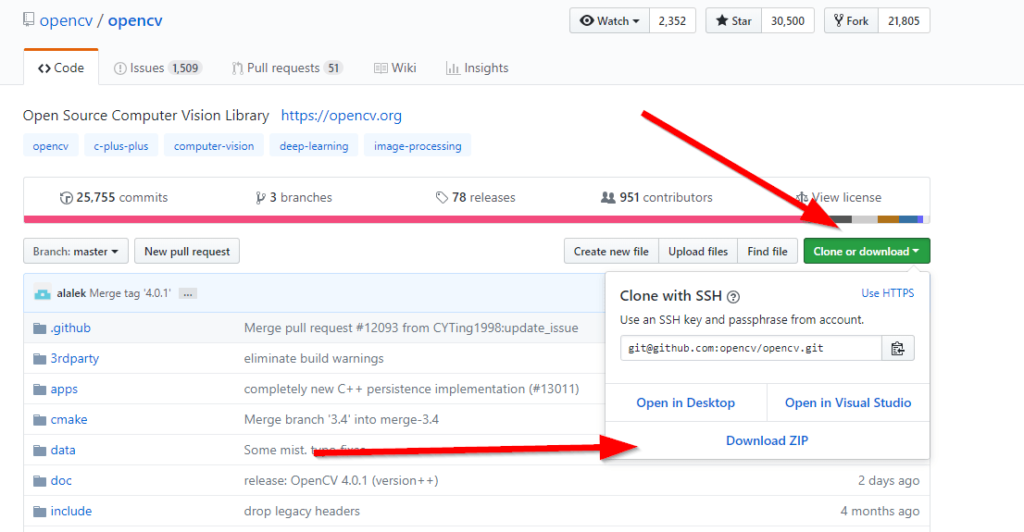
Note, make sure you complete this step for both the OpenCV and OpenCV_Contrib packages!
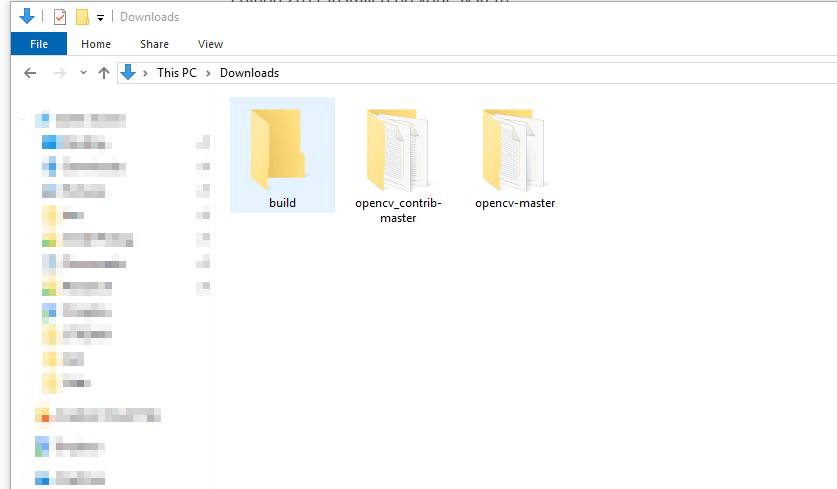
Once you have the archives downloaded, go ahead and extract them. You should end up with two directories, and opencv_contrib-master directory and a opencv-master directory.
Finally, go ahead and create a directory called build alongside these two directories.
Step 4: Generate the Visual Studio Project with CMake
We are finally getting close to being ready to build OpenCV, but we first need to generate the Visual Studio project that will be used to compile everything. This is where CMake comes in.
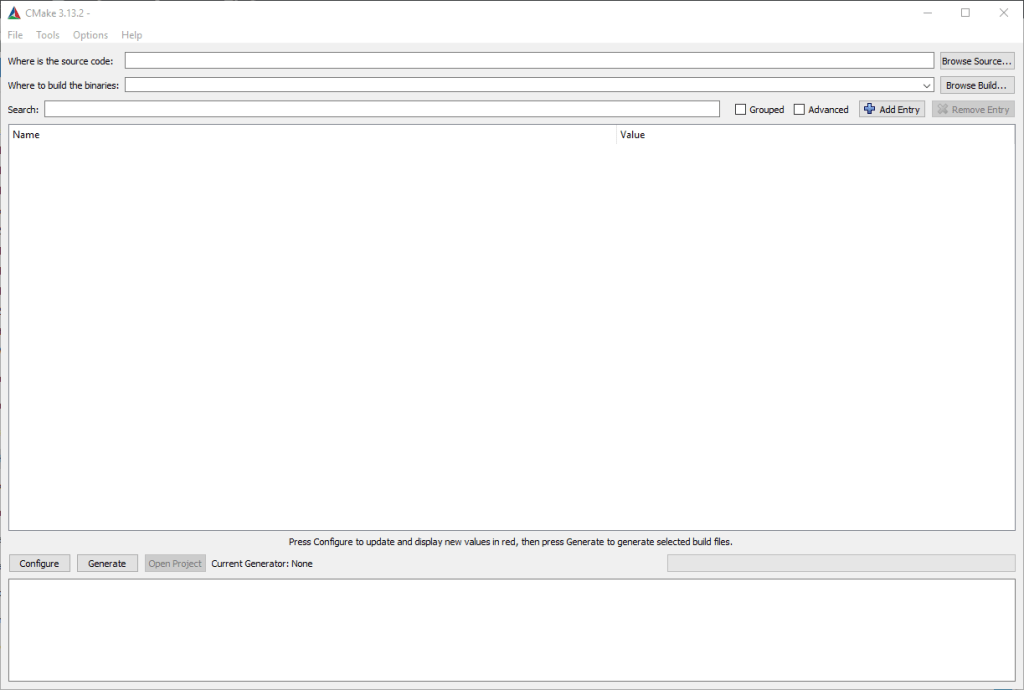
Go ahead and launch CMake and you’ll be greeted with the following GUI:
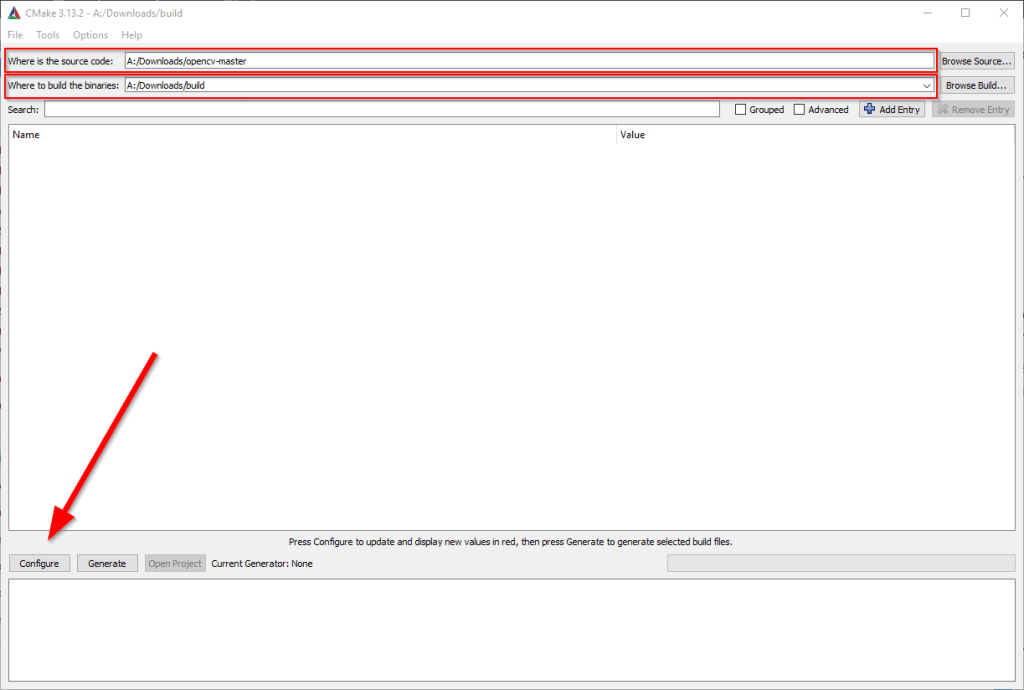
You will see two textboxes at the top, one for the source code and one for the path where the build files should go. In the source code box, navigate to the path of the opencv-master folder. In the build box place the path to the build folder we created a moment ago. Once that’s done, click the Configure button.
This will open another dialog box to configure what sort of project we want to configure. In the dropdown, select Visual Studio 15 2017 Win64 (Unless you want to build it as a 32-bit library, in which case you will choose Visual Studio 15 2017). Once that is done, click finish and wait for the configuration to complete.
NOTE 1: It appears that the more recent versions of the Cmake GUI have consolidated the options for configuring a Visual Studio project. Instead of selecting a Win64 specific version of Visual Studio, as outlined here, you can now simply choose your version of Visual Studio and continue the build process as outlined in this guide. You should still be able to build 64-bit versions of the library.
NOTE 2: This process seems to work fine for Visual Studio 2019 as well.

Once this step completes you will be presented with a whole bunch of configuration options. For the most part, we will be leaving these as their default values. I wouldn’t change these unless you know what you’re doing.
That is, except for one option that we do need to change. In the search box at the top, type the word path. This will limit the display to just a few options. The option we want to adjust is the one called OPENCV_EXTRA_MODULES_PATH. We want to change this value to be the path to the modules directory located within the opencv_contrib-master directory we created earlier.
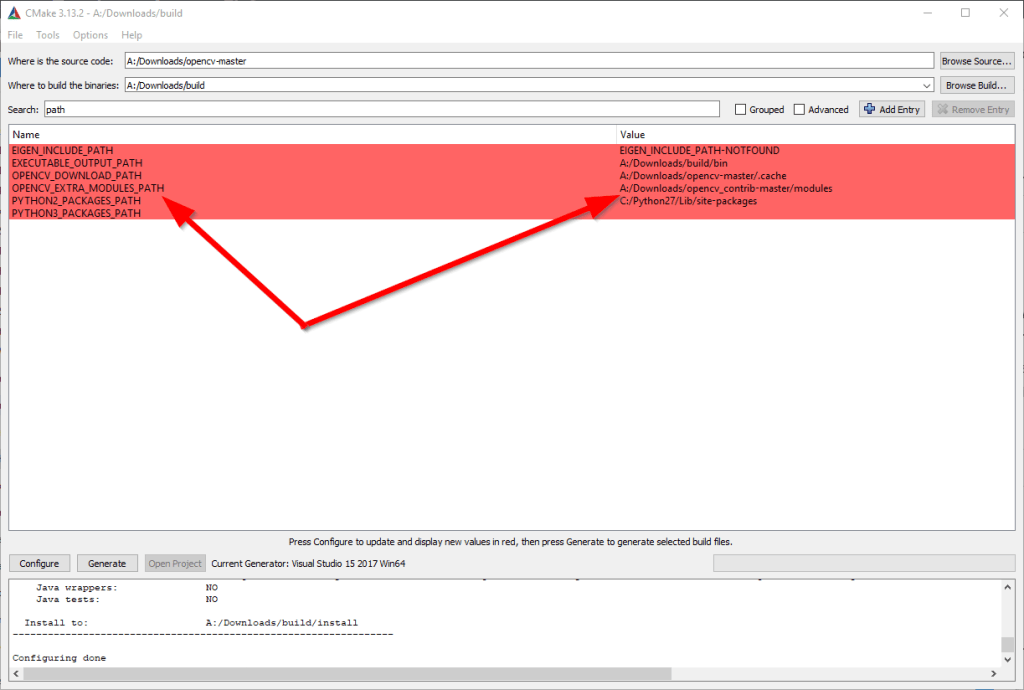
Once you enter this new value hit the Configure button and wait once again. This process should be much quicker this time around.
If all goes well, you should see a Configuring done message at the bottom of the log output. If it fails with any errors you’ll have to get those worked out before continuing on.
As a final step here, hit the Generate button to create the Visual Studio project that we will use to build OpenCV.
Step 5: Building OpenCV
Did I mention that this is an involved, somewhat painful process?! The good news is that we are finally to the point of building the OpenCV library!
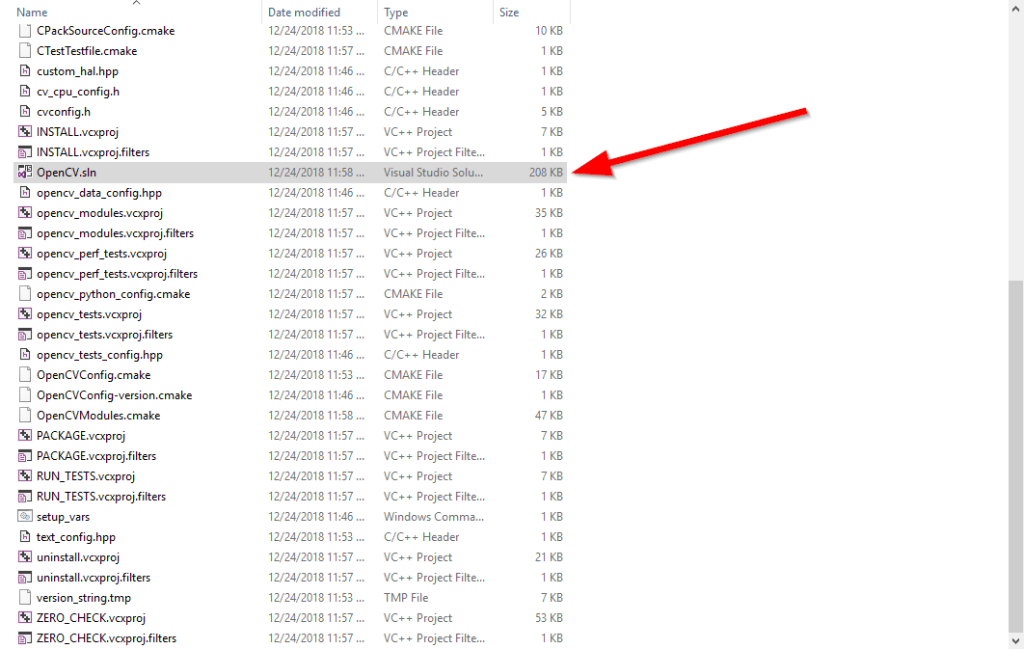
If you take a look in the build directory we created you should see a whole bunch of files, including one called OpenCV.sln. This is the solution file for the Visual Studio project. Double click it and it should open up the project in Visual Studio.
NOTE: It may take awhile for Visual Studio to fully load this project. It has a whole bunch of files to index!
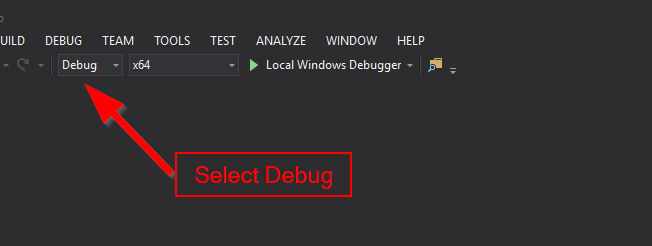
We’ll go ahead and build both the debug and the release versions of the library here. To start with, ensure that your build configuration is set to Debug. If not go ahead and change it. Next, go ahead and choose Build Solution from the Build menu (or just hit F6 on the keyboard).
Keep in mind that building the library will likely take quite a bit of time!
When this debug build completes, go ahead and change the build configuration to Release and build again.
After both of these builds are complete, find the INSTALL entry in the solution explorer, right-click on it, and choose Build.
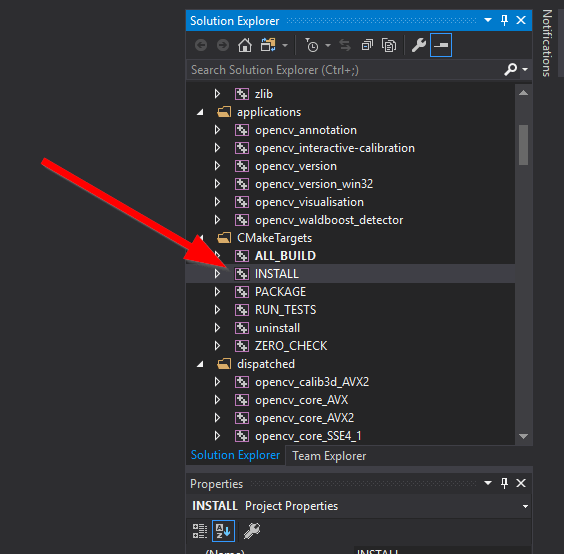
Once again, you will need to do this step for both the Release and Debug configurations. This build process shouldn’t take nearly as much time as the two previous!
Step 6: Move the Built Library Files
This step is really optional, but it’s one that I recommend doing to make your life easier, as well as to keep things organized.
Once you are finished with all the build processes outlined in step five your build directory will contain a whole bunch of files. Most of these are files that we no longer need. Also, if you did this like me, you probably just built this in your Downloads folder, which isn’t an ideal place to keep the library.
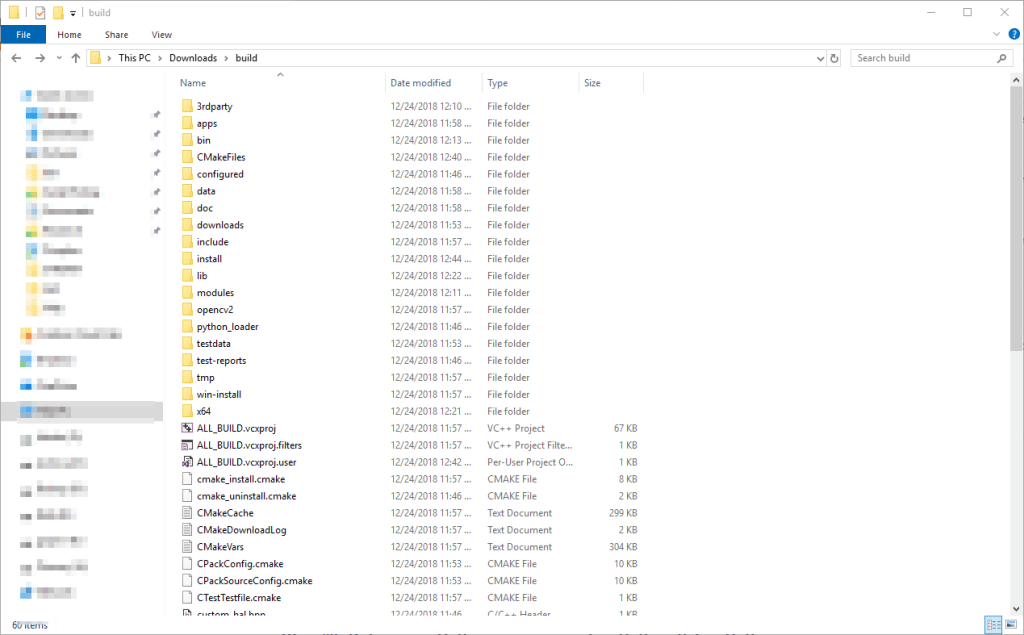
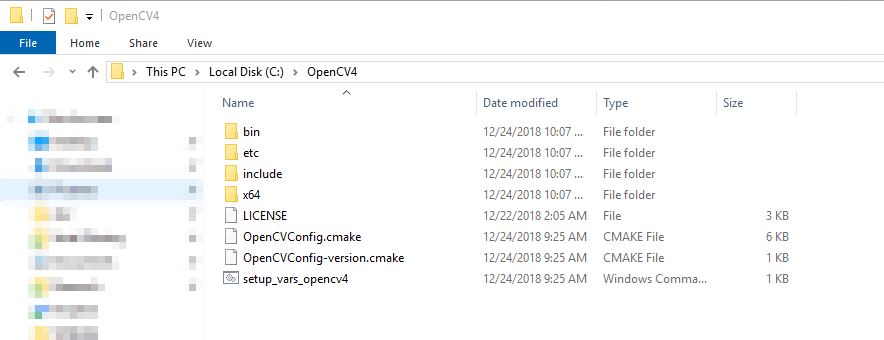
We no longer need the vast majority of these files! What I like to do is create a directory in the root of my C:\ drive for OpenCV. This way the files are easily accessible when I need them. I then copy the necessary files over to this new directory.
What files do we need, you ask?
Well, within that cluttered build folder there should be a directory called install. This is the folder that contains the build files that we need. Just copy the contents of this folder over to your newly created OpenCV folder.
Finished
Boy, that sure is a long process! The good news is that we’re finally done!
We now have a completely built version of the OpenCV library stored in a convenient place on disk that’s ready to be used in some projects. So, what are you waiting for? Go start playing with that computer vision goodness!
To get started using the newly built OpenCV library, go check out my tutorial on how to setup an OpenCV project in Visual Studio 2017 & 2019.